DIY Key Holder
I hate keychains. I hate finding the keys on them, their needless bulk, their weight, and their incessant jangling. So I was really happy when I learned that alternatives exist. In fact, there are many of them.
Out of all these interesting metal contraptions, I like the simple design of the KeySmart best. It is basically just two pieces of aluminum screwed together with binding posts that run through the holes in your keys. The keys are not held under too much tension and swing out the sides with ease.
I was disappointed to find, however, that as much as the KeySmart excels in the best design pattern (my opinion), it really sucks in implementation. At 20 dollars, the product is a tad overpriced to begin with. Then add on the fact of badly designed screws that loosen over time. Then add cheap, weak hardware that is prone to split upon tightening (I can personally testify). And for this broken product, the company offers no support whatsoever. I emailed them about my broken hardware, and they never responded. I found several reviews complaining of the same. In sum, great idea, bad product, terrible company.
So I made my own. Better, Cheaper, Stronger. I have been using it for over 6 months (this post is a little past due), with no problems whatsoever.
Edit: Years later, I should tell you there is one big problem with this design. It doesn’t work super well in the ignition of a car. When a car key is used the rest of the body falls downward, potentially with the opposite key sliding out, creating a long lever attached to the ignition key. If your knee bumps this lever you could accidentally shut off the car (oof!). I am still using this very same key holder, but I did need to solve this issue. I just flip the keyholder upward and keep it in place by draping the loop attachment over the turn signal switch. You may require a heavier loop attachment than just a USB flash drive; I currently have a small keychain swiss army knife on mine.
Without further adue, I present to you my key holder.
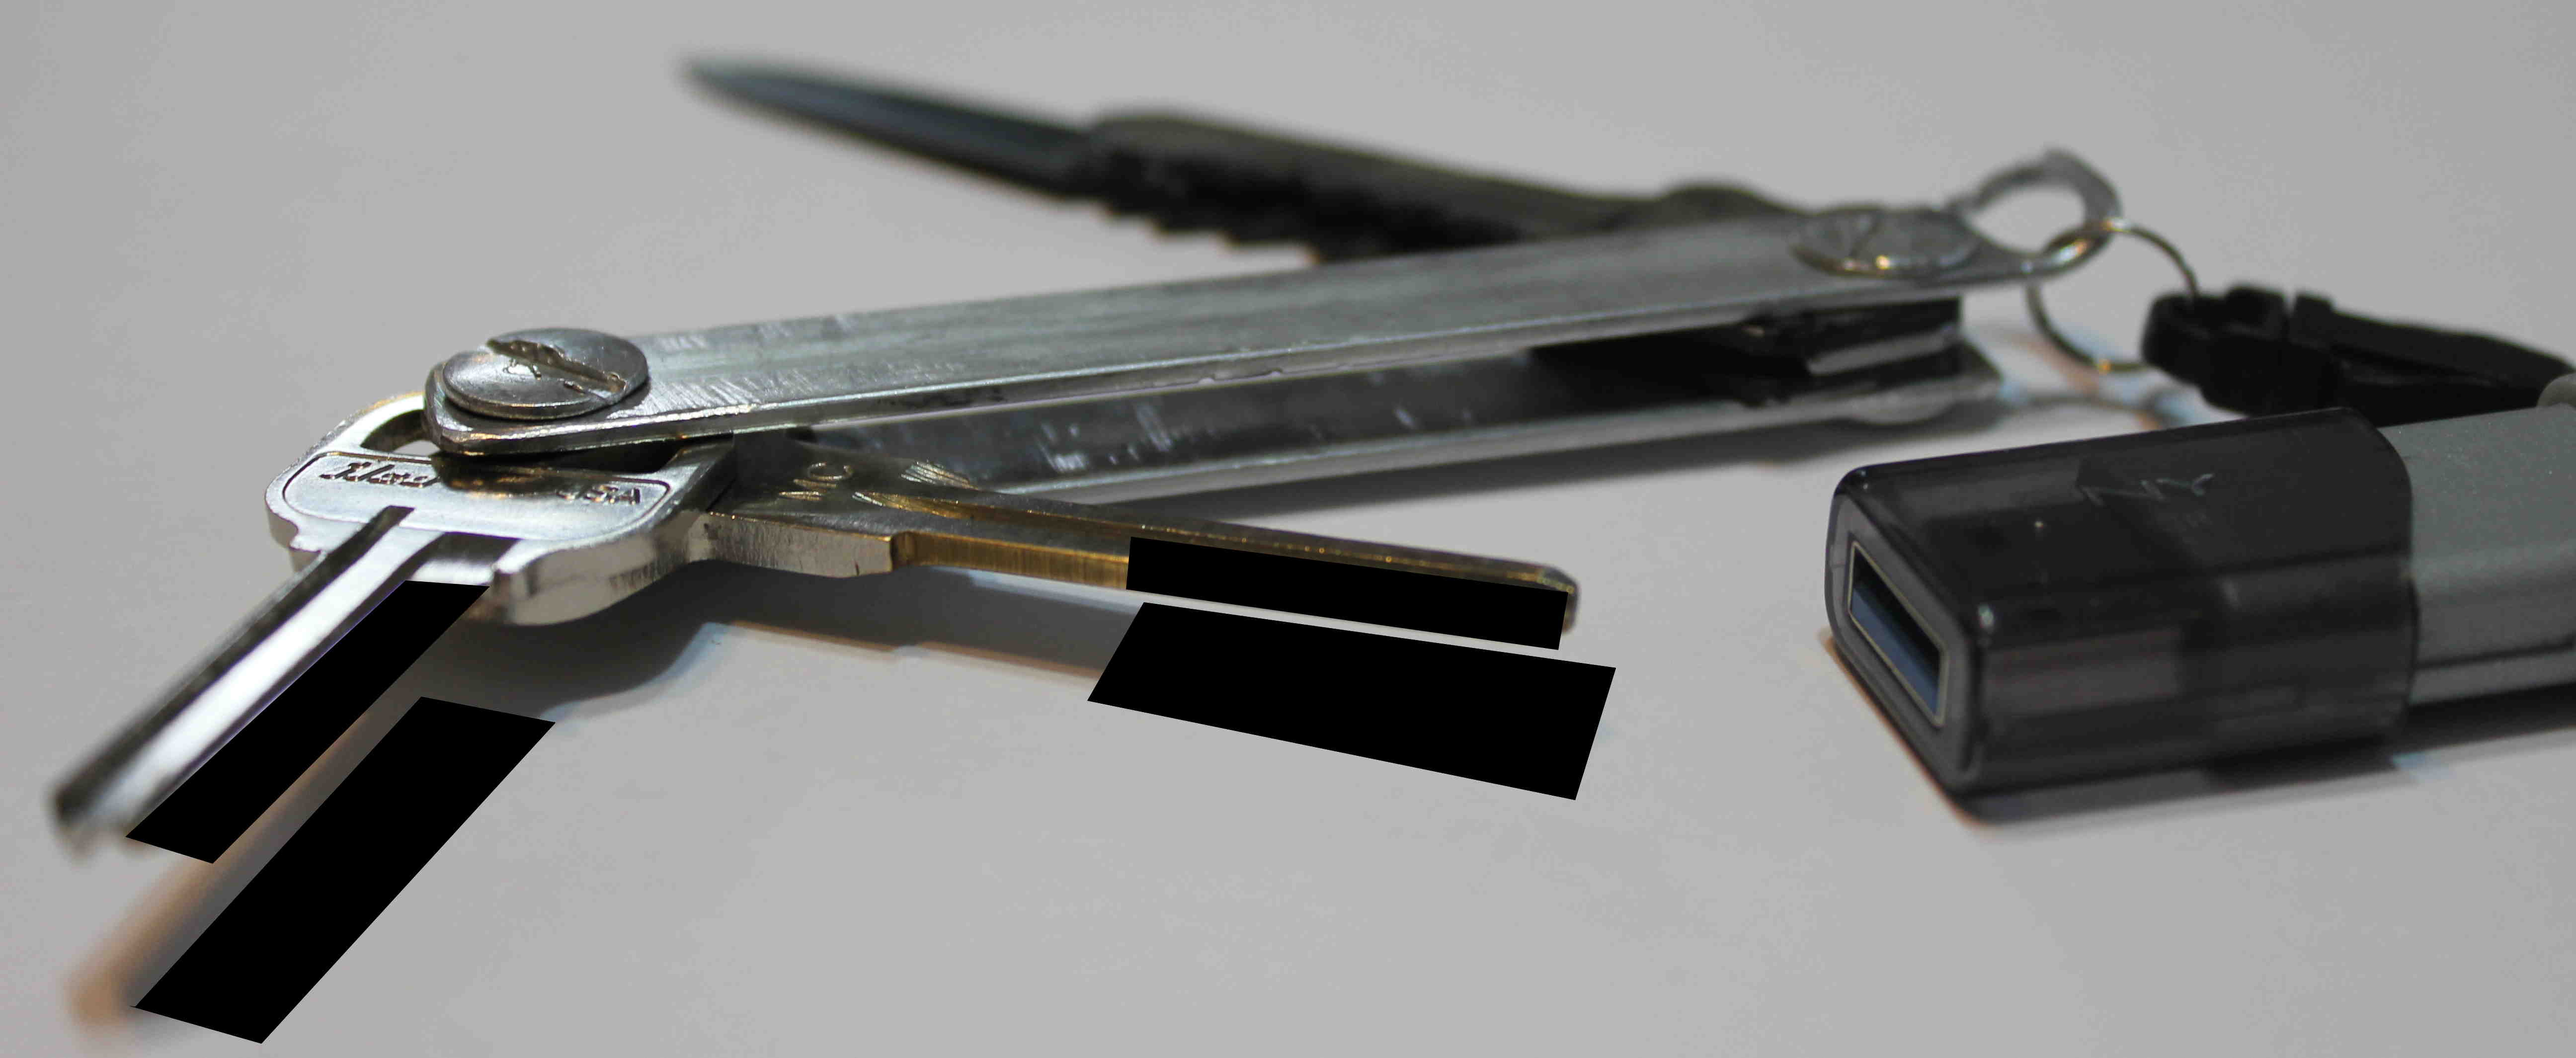 Top side
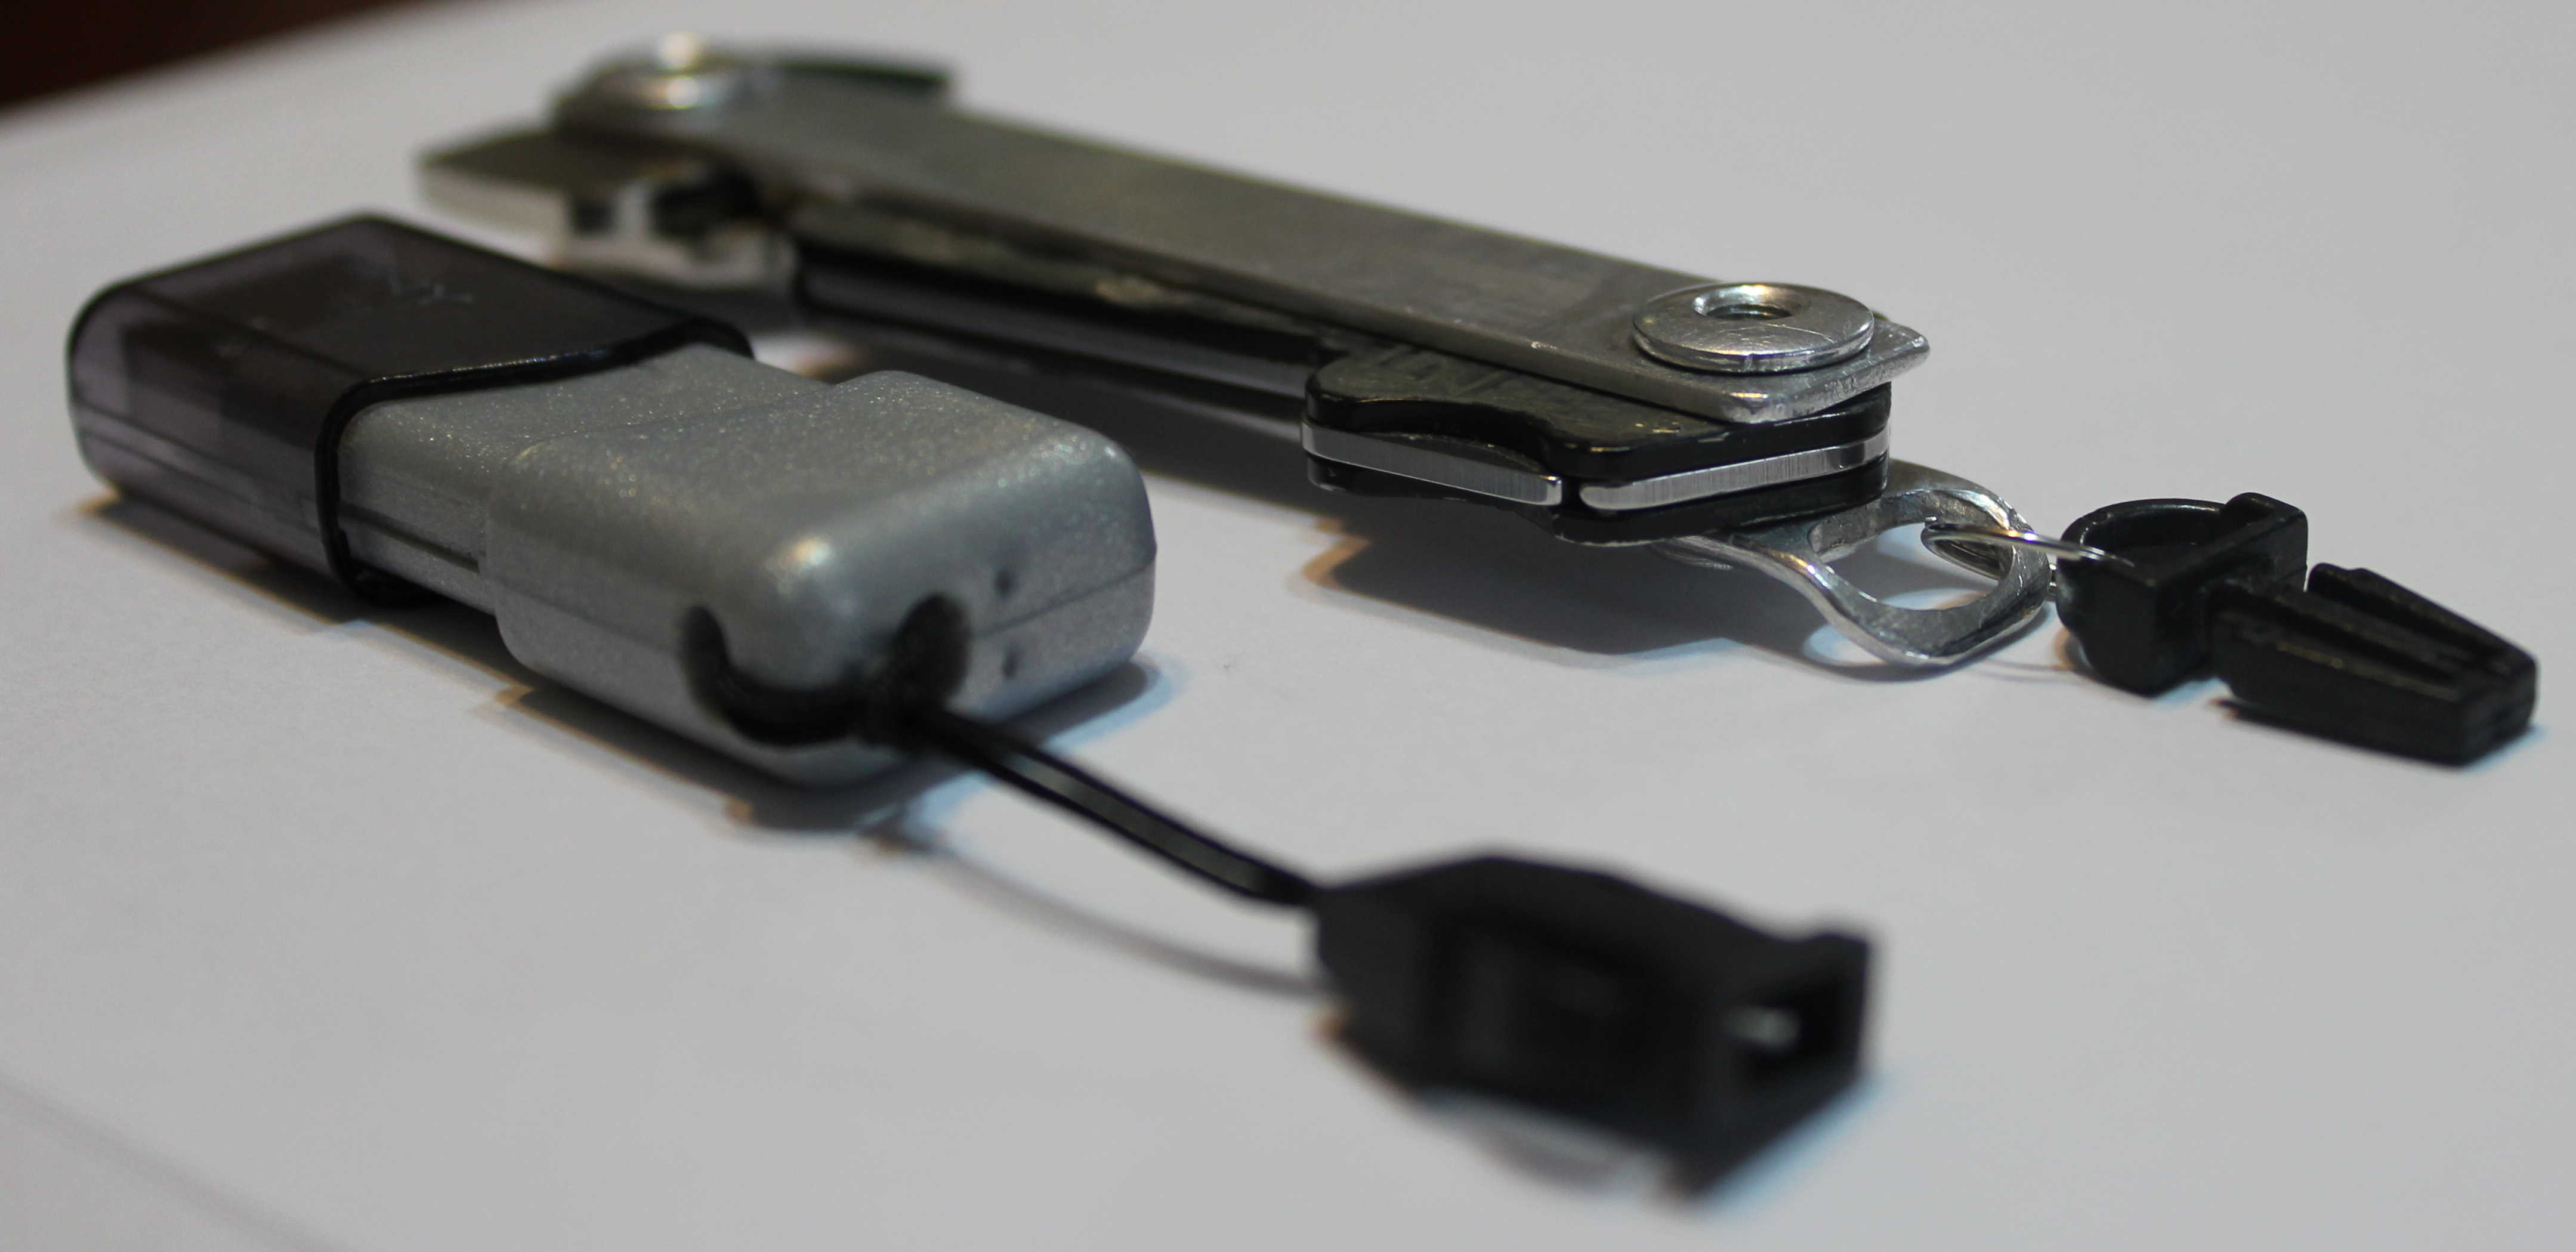 Bottom side
My build holds my house key, my car key, a knife, and a USB flash drive. It is about as light as it gets, the parts needed to hold these things together weigh less than a single one of the keys it holds. It fits in my pocket easily, makes no bloody noise, and is fun to play with (much to my wife’s annoyance). The keys easily swing into operation; I can cut open packaging at any time; and I can quickly disconnect the USB drive and use it in any computer on the go.
Parts List
You should be able to find these parts or decent equivalents in your local hardware store. There are different sizes of binding posts available, and even post extenions. Therefore modifications should be possible to support more keys, though it is important that the binding post has the hole all the way through, i.e., screws can be threaded from either side.
| Part | Part # | Quantity |
|---|---|---|
| Aluminum Flat 1/16 x 1/2 | Hillman 11307 | 1 |
| Posts with Aluminum Screw 8-32 x 1/4 | Hillman 3826-D | 2 |
| Socket Head Set Screw 8-32 x 3/16 | Hillman 831-C | 2 |
Construction
The basic build consists of one 3 1/2” plate, and one 3 7/8” plate, with 13/64” holes 3” apart. Just use two 3 1/2” plates if you decide against the loop piece.
- Cut the plates. Hacksaw recommended over scissors.
- Drill out the binding post holes and the loop piece. The loop piece can be drilled with two 13/64” holes, then combine the holes by file or tilting the drill.
- Round off all edges with a file.
- Assemble the binding posts with keys. Tighten the screws with the aim of gaining enough tension that the keys hold in place against gravity, but are still easy to move.
- With a decent approximation of the correct screw depth, tighten the set screws into the recess against the binding post screws. This will lock the posts in place. Turning one end should just turn the other end, and never loosen.
- Now that there is no risk in bending the plate with it, bend the loop piece upwards with heavy-duty pliers. When I first came up with this design, I thought it would remain flat. However you’ll quickly find out that if you have a split ring on it, you can’t swing out your key all the way on that side.
Modifications may need to be done to your keys to fit. These are wider binding posts than used in the KeySmart. In my case, my house key fit without modification. My car key had that annoying bulky plastic end on it, but it turns out you can take a hobby knife to that and drill a perfect hole. It works out nicely since it has an odd winged shape that provides excellent leverage for swinging the key out.
I also added a SOG Key Knife to my build, which also required some modifications. I have yet to find a key knife that is perfectly flat, they all have rivets that create problems for this design. I was able to grind down the rivets with a Dremel, which somehow did not destroy it (your mileage may vary). I also filed it down and applied JB Weld to it in the hope of stengthening the remains of the rivets. It makes for a really ugly looking key knife, but it is very useful (mostly for opening boxes). Keep in mind that even with these modifcations, the SOG Key Knife will take up about two key slots.
Lastly, my build has a USB flash drive attached. I got a whole lot of these detachable straps (they are cheap) to attach the drive with. Most USB flash drives have a loop you can push the strap through, then push the detach end through the strap and pull taught (you can also do this multiple times to get it shorter).
Conclusion
Go forth, and build! Free yourself from the tyranny that is keychain!
| Published | 2016-03-18 | Updated | 2022-07-24 |
|---|